
This post is a dress diary for my competition entry into the Foundations Revealed 2017 competition. There’s a lot of rambling about the construction methods and it’s very picture heavy.
So there’s an incredible website called Foundations Revealed that is essentially a treasure trove of corset and underpinning-making know-how. I’ve been a member for around 4 years now and I’ll never cease to be amazed by the incredible wealth of knowledge and inspiration that it offers. Every year they run a corset making competition; you can see my 2015 and 2016 entries here. I’ve been quite fortunate so far in that the ‘themes’ have aligned with projects I’d already happened to make; this year, I had no such luck.
The theme for 2017 is ‘ballet’, and it’s a broad umbrella of inspiration. Last week I noticed that my sewing schedule had freed up a bit and that I had always wanted to make a tutu… So of course I decided it would be sensible to spend the next week panic sewing a full couture outfit.
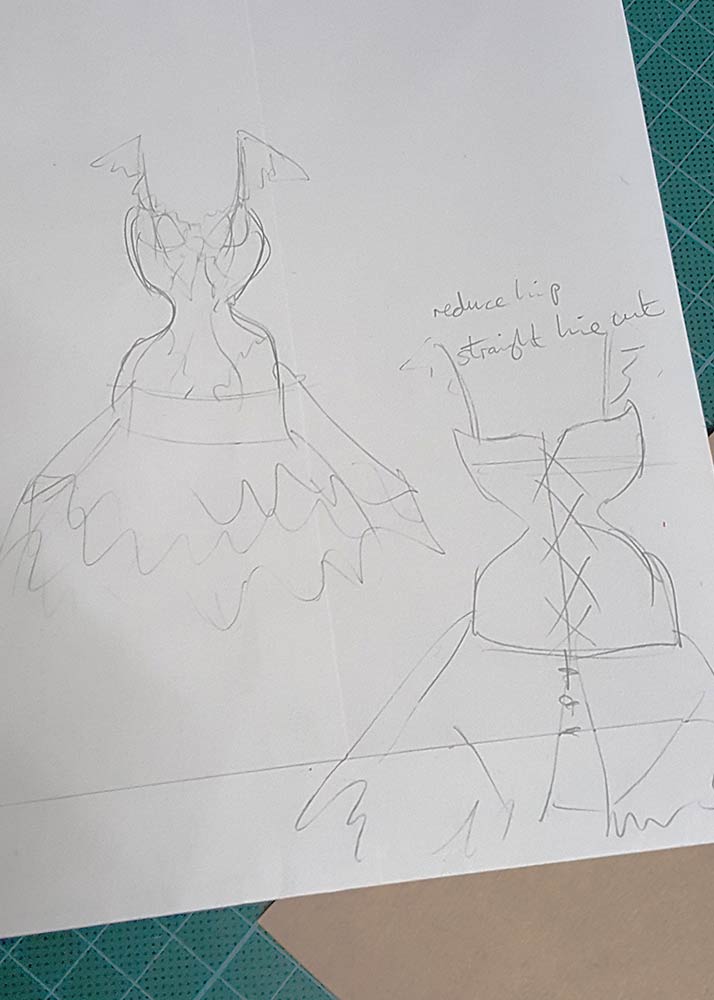
Photo by Karolina Laskowska
It’s not an entirely uncommon occurrence for me to start ridiculous projects like this on a whim. Sometimes I get a peculiar drive to just create something, and it does mean that these sorts of designs are rarely actually planned out. At most, I will scribble a small sketch on the back of an envelope (as in this case), and then try to work out which bits in my fabric cupboard can be used (I almost never buy new fabric specially for a project… I just hoard things until they become relevant). Hence, it was a roll of red silk tulle, a couple of metres of cream silk duchesse, white bobbinet tulle and white coutil that formed the basis of this design.
The inspiration for this piece is the fairy Violente from the Sleeping Beauty ballet. Sweet Nothings informed me that this particular character should be smiling with disdain at everyone, and that she gifts the princess ‘A Forceful and Commanding Presence’. I mean, what’s not to like? Researching the ballet meant falling into a YouTube hole of incredible dancing and stunning costumes. The opulence and lushness of colour was giving me a lot of ideas on where to take this piece, even if I wouldn’t be faithfully replicating an existing costume.
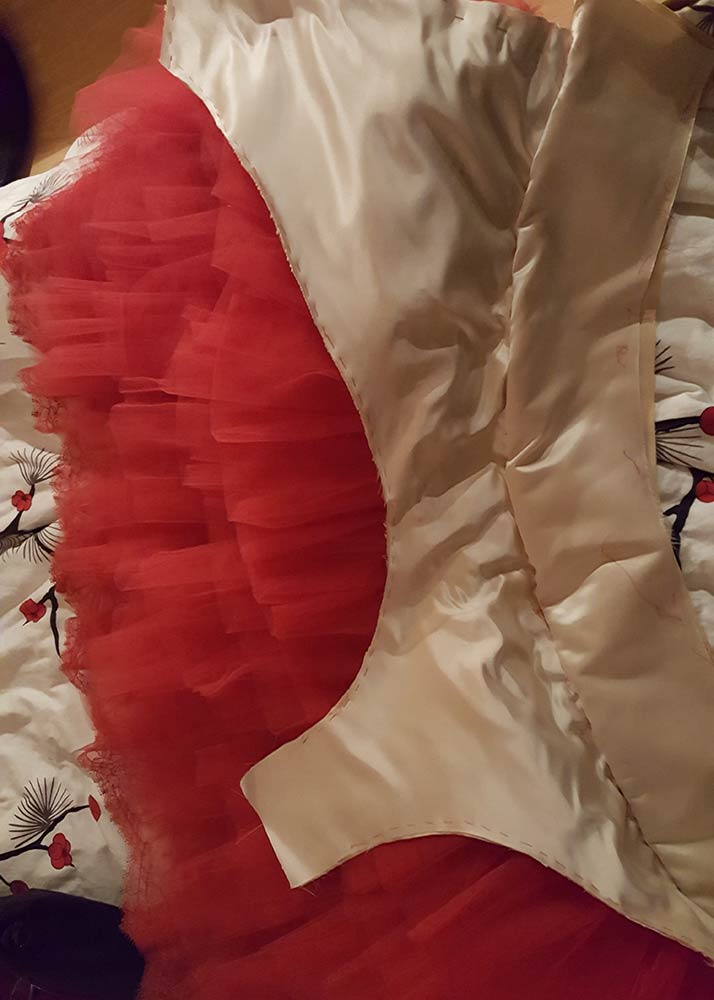
Photo by Karolina Laskowska
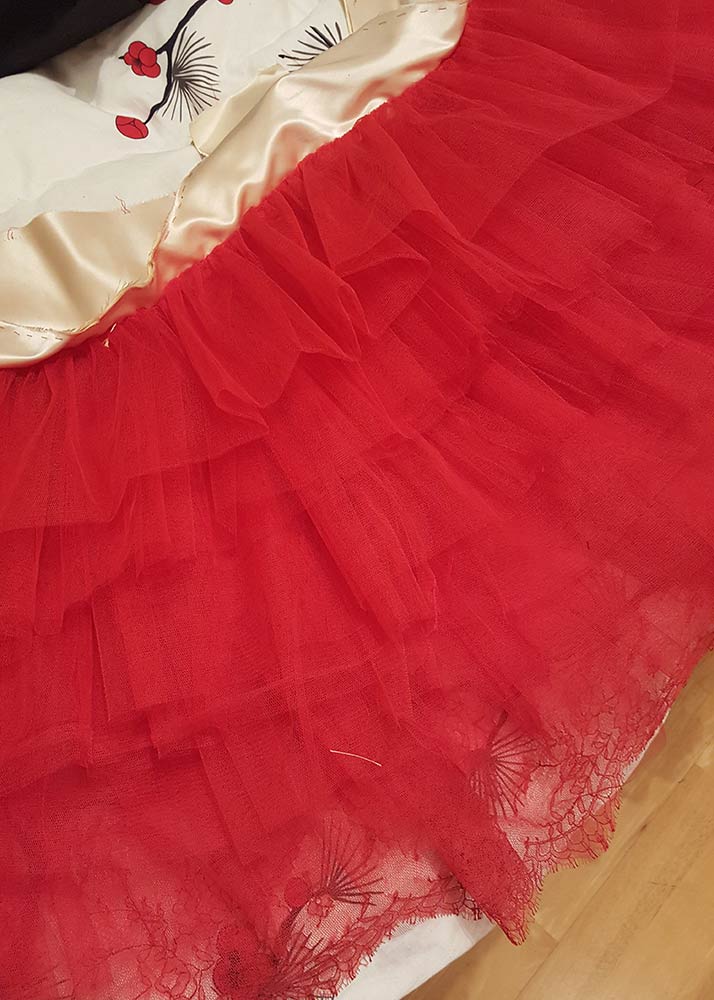
Photo by Karolina Laskowska
It was actually the tutu that I started first. From having watched a couple of videos over the last few years, I had an inkling of how tutus were constructed but not any formal knowledge. So of course I jumped in headfirst and made it up as I went along. This mostly involved cutting a knicker shape in silk, cutting various sized strips of silk tulle, ruffling the tulle and then stitching it onto the knicker. Longer layers at the top, with a lace trim on the top layer, getting shorter and denser further down to support the skirt on top.
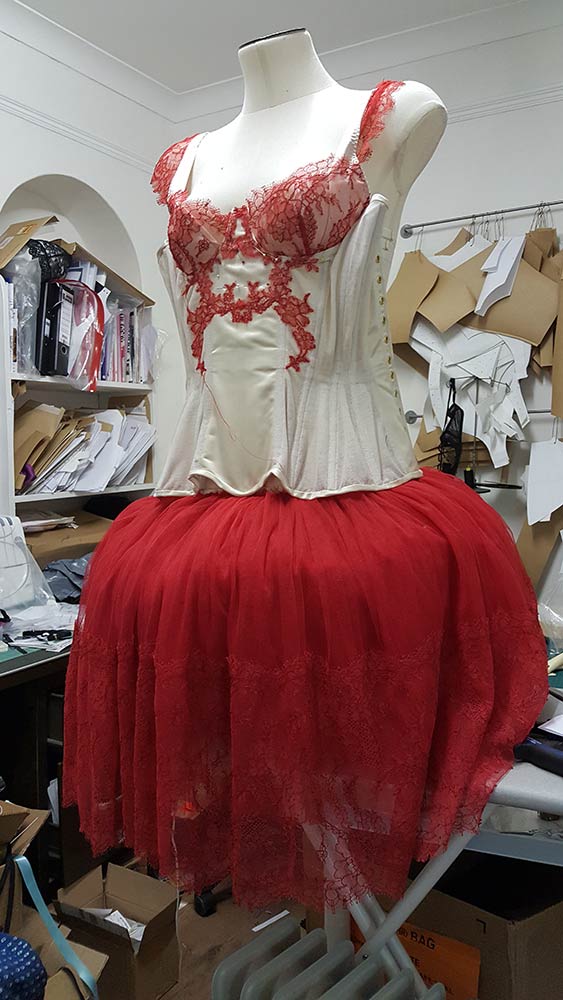
Photo by Karolina Laskowska
At one point I sewed channels into the tulle layers for wire supports to be added, but it made the skirt a rather peculiar shape, so I’ll be saving that technique for when I attempt a ‘proper’ pancake tutu rather than a romantic one (and note to self – silk tulle is definitely too light for that). The knicker base I gave a cheeky lingerie twist to: the back of it is ouvert and buttoned up with silk loops and contrast covered buttons. They were constructed as with other lingerie, with plush elastic at the legs and waist (and good god it is difficult to sew that with all those tulle ruffles attached). Finally, the join between the waistband and skirt was hand embellished with organically placed lace appliqué – not that you can see it when the corset is worn, but these details matter to me!
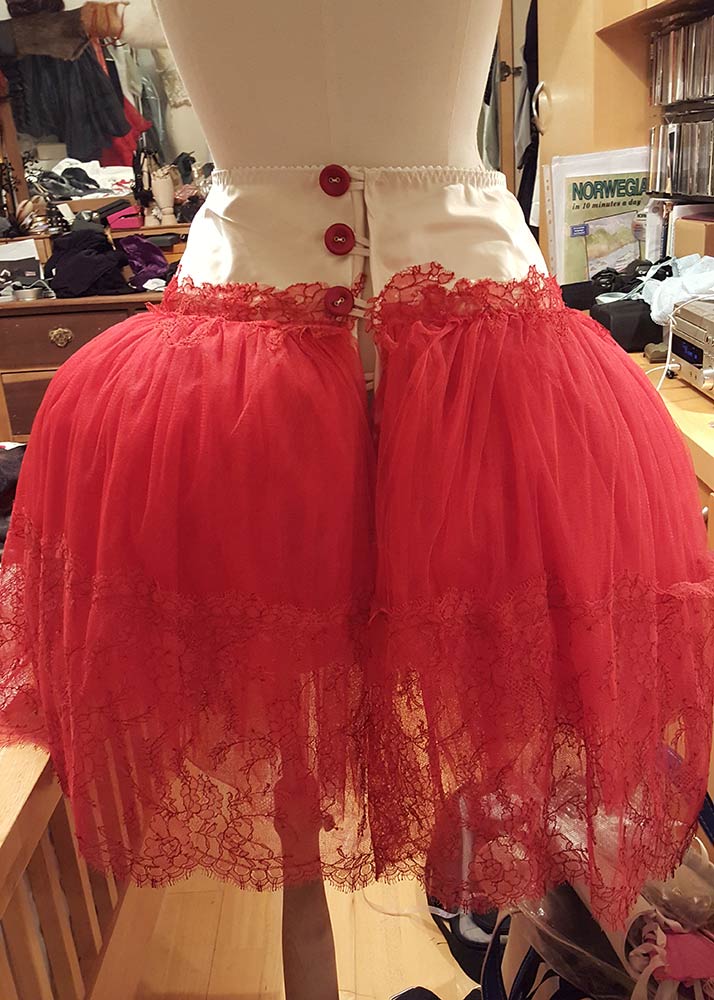
Photo by Karolina Laskowska
I decided that the corset in question would be a cupped corset. It was fairly obvious to me that I should try to put a lingerie sway onto this project, given that it’s my specialism. Bra cups are particularly tricky to insert into corsets, given the extra bulk and different ways that tension is exerted onto the body. My 2016 competition entry was also a cupped corset, but I wanted to attempt a different shape and refine the fit even further this year.
The first thing I did was to tone down the bright white of the coutil and cotton bobbinet. The white was just too obvious, and I wanted something softer like the cream silk. I boiled them in used tea leaves for a couple of hours until they’d absorbed a lovely subtle teastain.

Photo by Karolina Laskowska

Photo by Karolina Laskowska
Then came the corset patterning. The main fit is based on this series of corsets from my Summer 2016 mini collection, but tightened up slightly (I have a terrible habit of not toiling personal projects!). There are 6 panels per side which gives a nice distribution of tension to the flexible bobbinet without too much strain. This number of panels also makes it possible to give a dramatic shape without risking damage to the fabric. I wanted a very tight, nipped waist to this corset, with a lovely rounded hip and rib (the finished piece has a 18.5″ waist with a 15.5″ hipspring). The cups are quite complex, with 6 panel pieces each. A foam liner gives structure, whilst the silk sling gives a base for the lace cap sleeves.
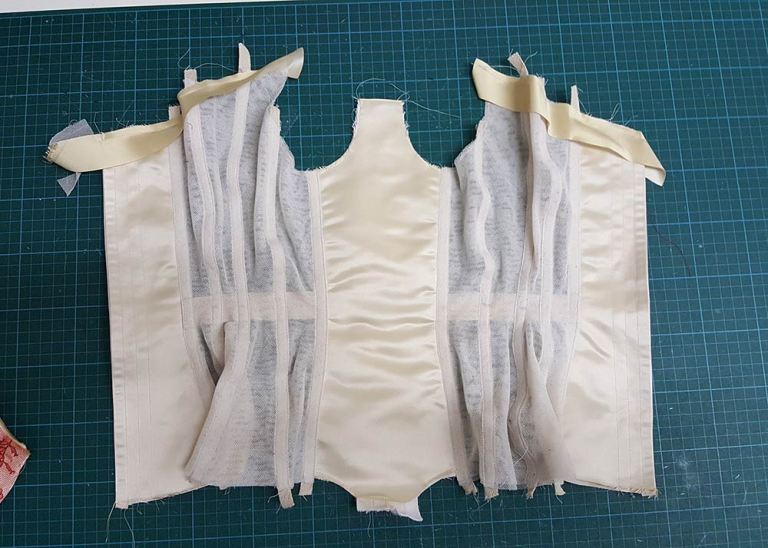
Photo by Karolina Laskowska
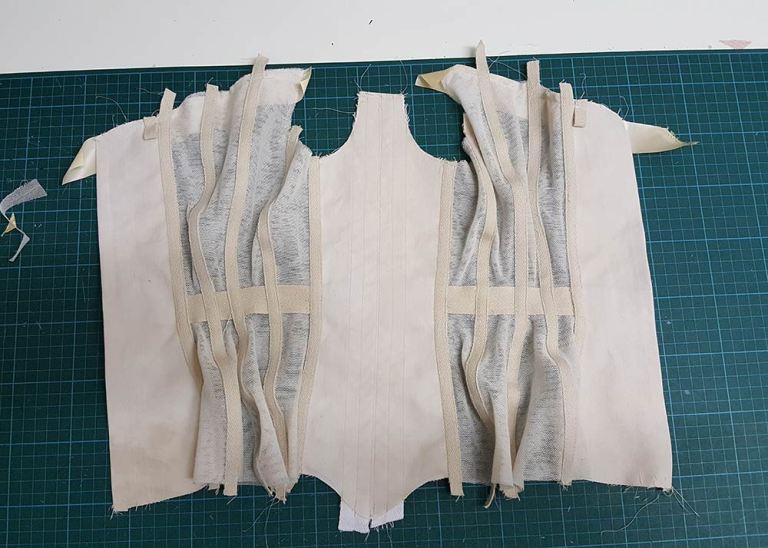
Photo by Karolina Laskowska
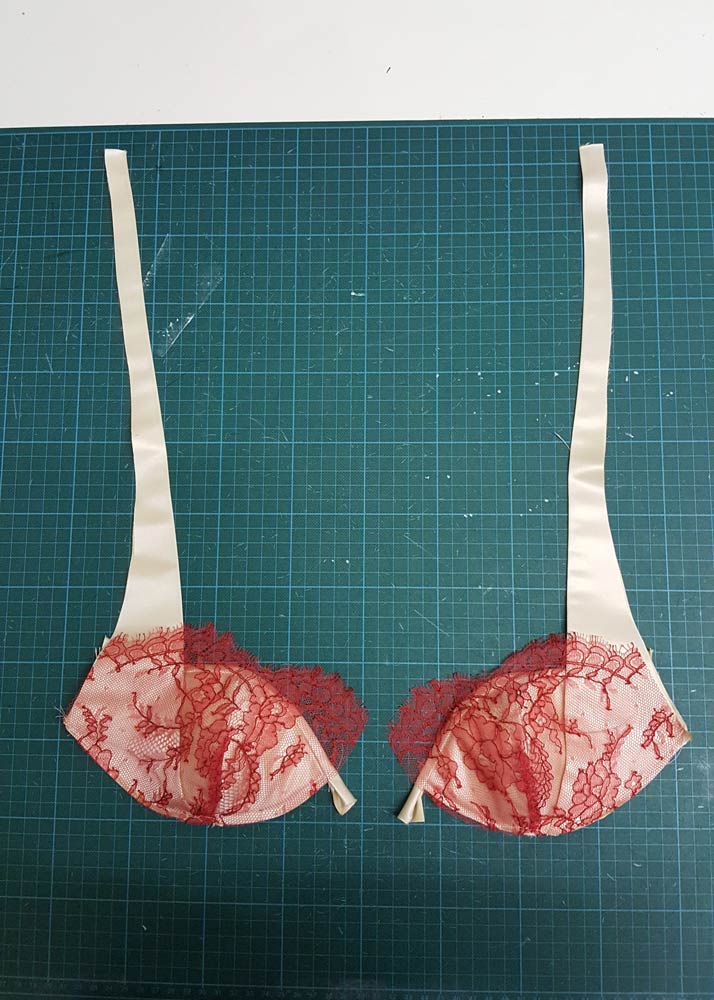
Photo by Karolina Laskowska
Sewing together the base of the corset wasn’t particularly complex. I use a light twill tape for the bone channels, sandwiching the bones underneath the fabric seam allowance. Twill tape is my preferred bone channel on bobbinet as it isn’t particularly bulky, and makes the insertion of cups easier. After the cups were inserted, the seam was taped over with a plush wire casing, half top stitched and then hand tacked down for a clean exterior finish. The bones are all either 5mm spiral steels or flat steels. Finally, the cream silk binding was stitched on and hand finished, and gold 5mm eyelets were inserted. With all the base construction out of the way, it was time for the fun bit!
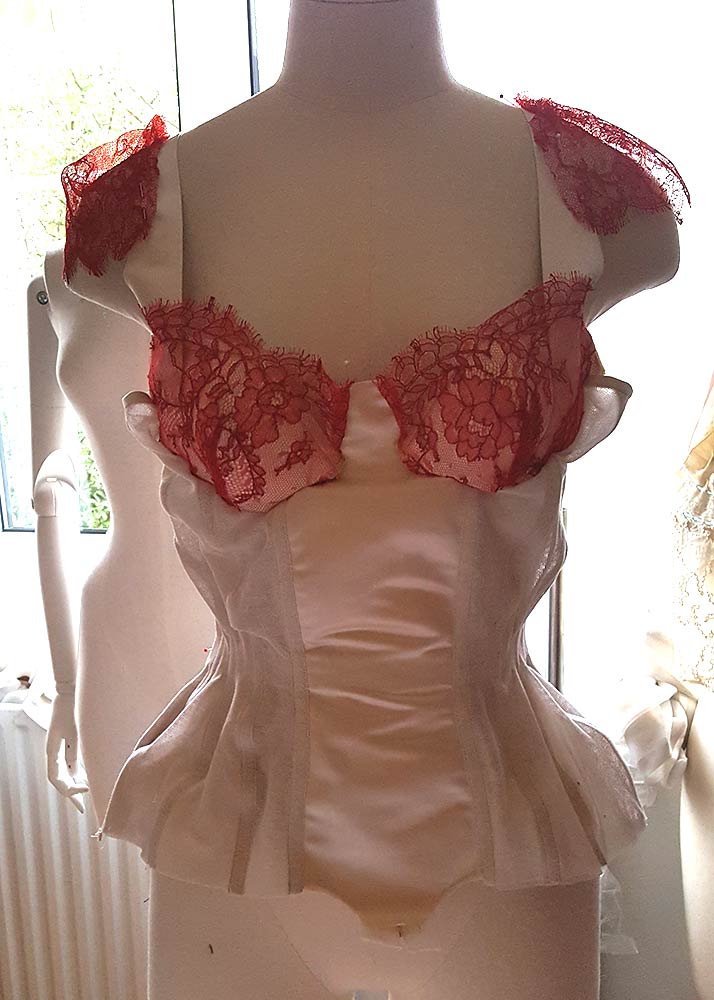
Photo by Karolina Laskowska
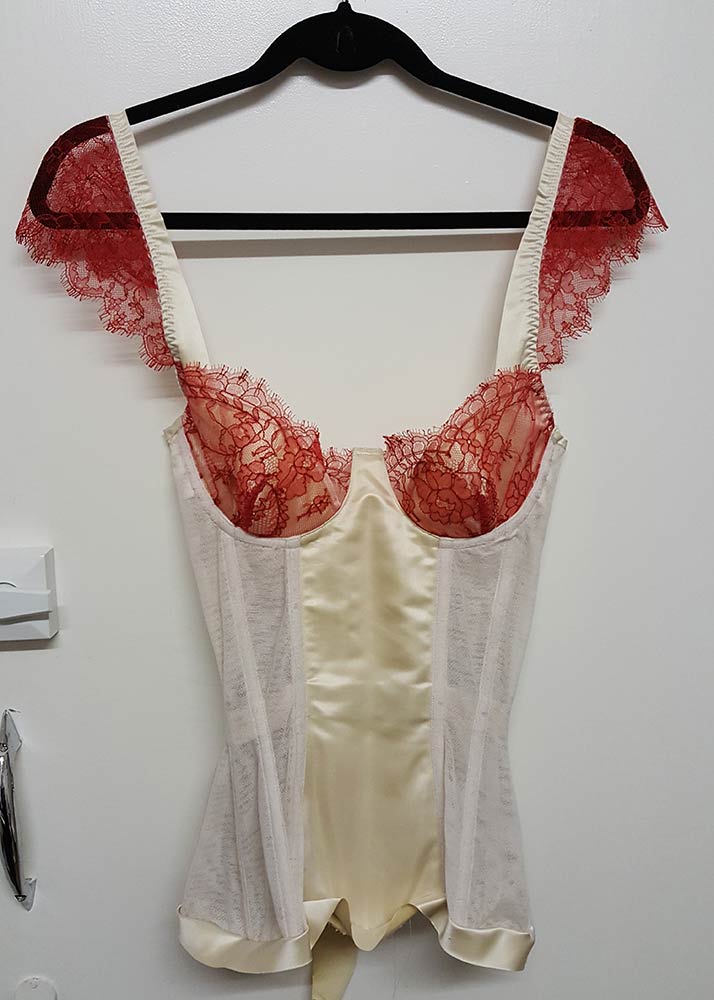
Photo by Karolina Laskowska
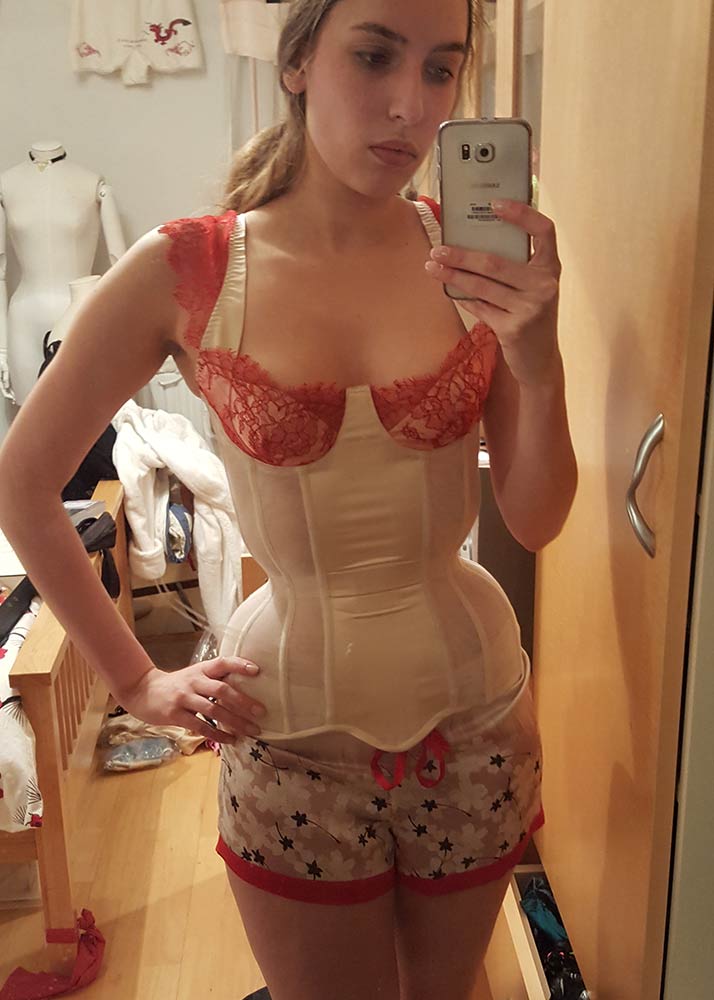
Photo by Karolina Laskowska
Embellishment is the most exciting part of any project for me: it’s what transforms a garment from just nice into spectacular. The vision that I had for this piece was of delicate French lace gracefully and symmetrically trailing across the corset body, encrusted with bold and sparkling jewels.
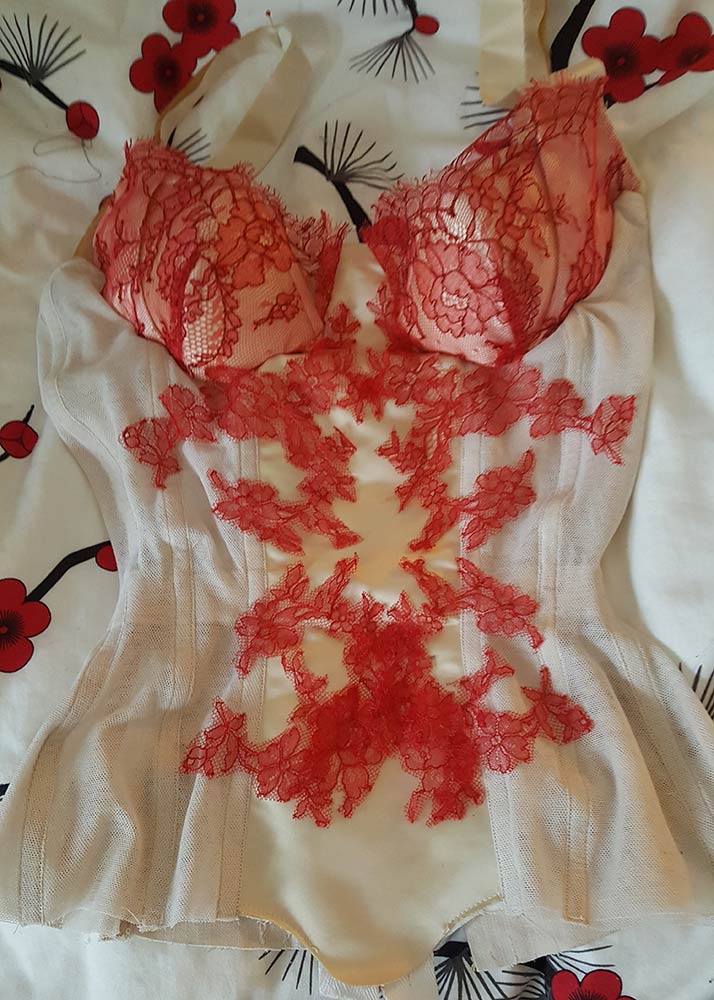
Photo by Karolina Laskowska
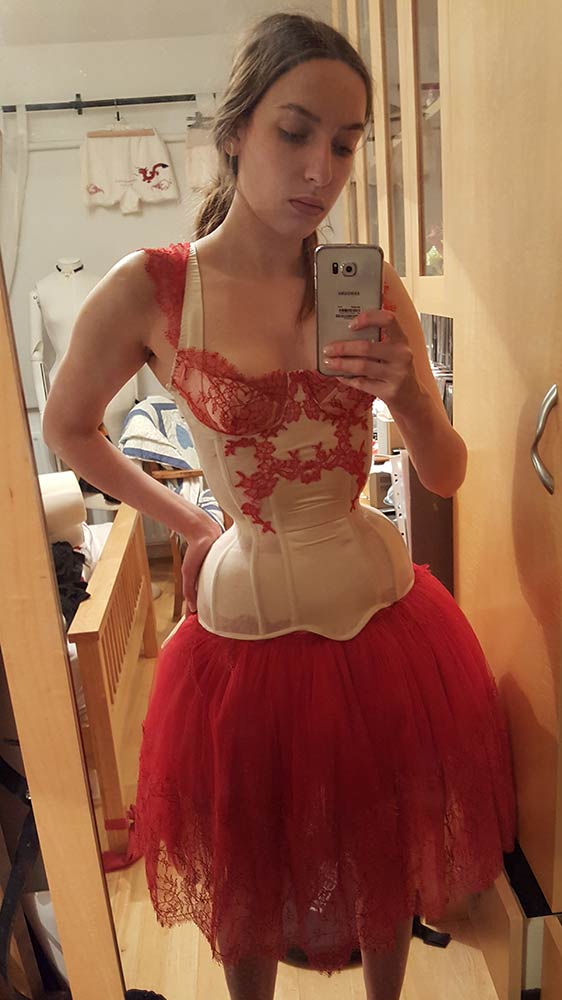
Photo by Karolina Laskowska
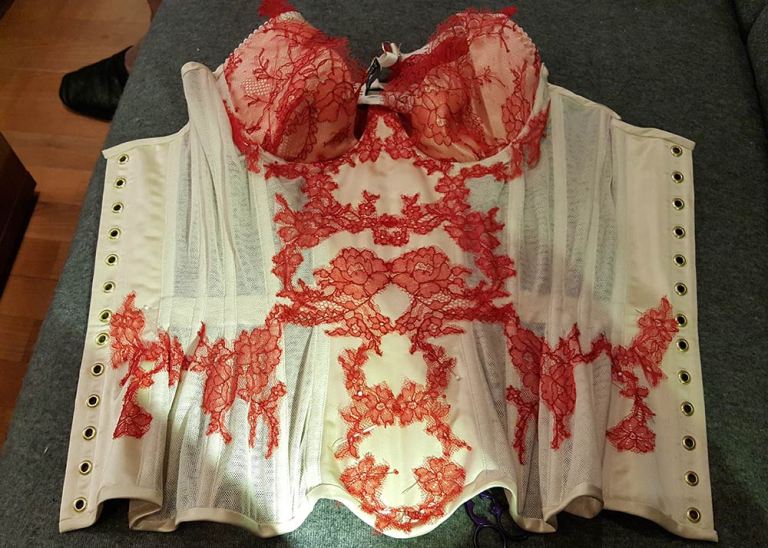
Photo by Karolina Laskowska
The lace proved easy enough to work with: although the cutting and hand stitching takes hours (seriously, there’s easily around 15 hours of laces stitching in this outfit), placing it is a relatively organic and flowing process. Nothing pre-planned, just allowing the lace to be arranged into the most aesthetically pleasing manner. I used two types of lace in this piece in subtly different shades of red. One was a galloon that I’d held in my stash for nearly a year (clearly waiting for the perfect project), and the other… was a flounce trim that I cut from the hem of an Alexander McQueen gown. Before the pitchforks come out, the gown needed shortening anyway!

Photo by Karolina Laskowska
After several days of stitching, I was getting to a near-satisfactory stage with the lace appliqué. I started to think about how to bring the sparkles into this piece, because all the best ballet costumes are sparkly. I’d purchased a number of Swarovski crystals in the Light Siam shade in large quantities, when disaster struck: no matter how I arranged them, they did not look good. I stitched some down at 2am one night and the next day was so disgusted I tore them off and damaged the silk underneath with the needle holes. Cue, covering it up with lace.

Photo by Karolina Laskowska

Photo by Karolina Laskowska
This is when panic started to set in. The corset didn’t feel finished with just lace, but the red crystals just looked wrong! So I started to try everything in my stash.
Clear crystals – too white, too bright, too many different shapes.

Photo by Karolina Laskowska
Amber crystals – only one scale, looked odd.

Photo by Karolina Laskowska
Crystals ripped off a Damaris basque – better, but still not good enough. Not worth sewing on, as lace alone still looked better.

Photo by Karolina Laskowska

Photo by Karolina Laskowska
At this stage, my patient friends on facebook told me to leave the corset alone for a bit and go and do other things. It was sensible advice.
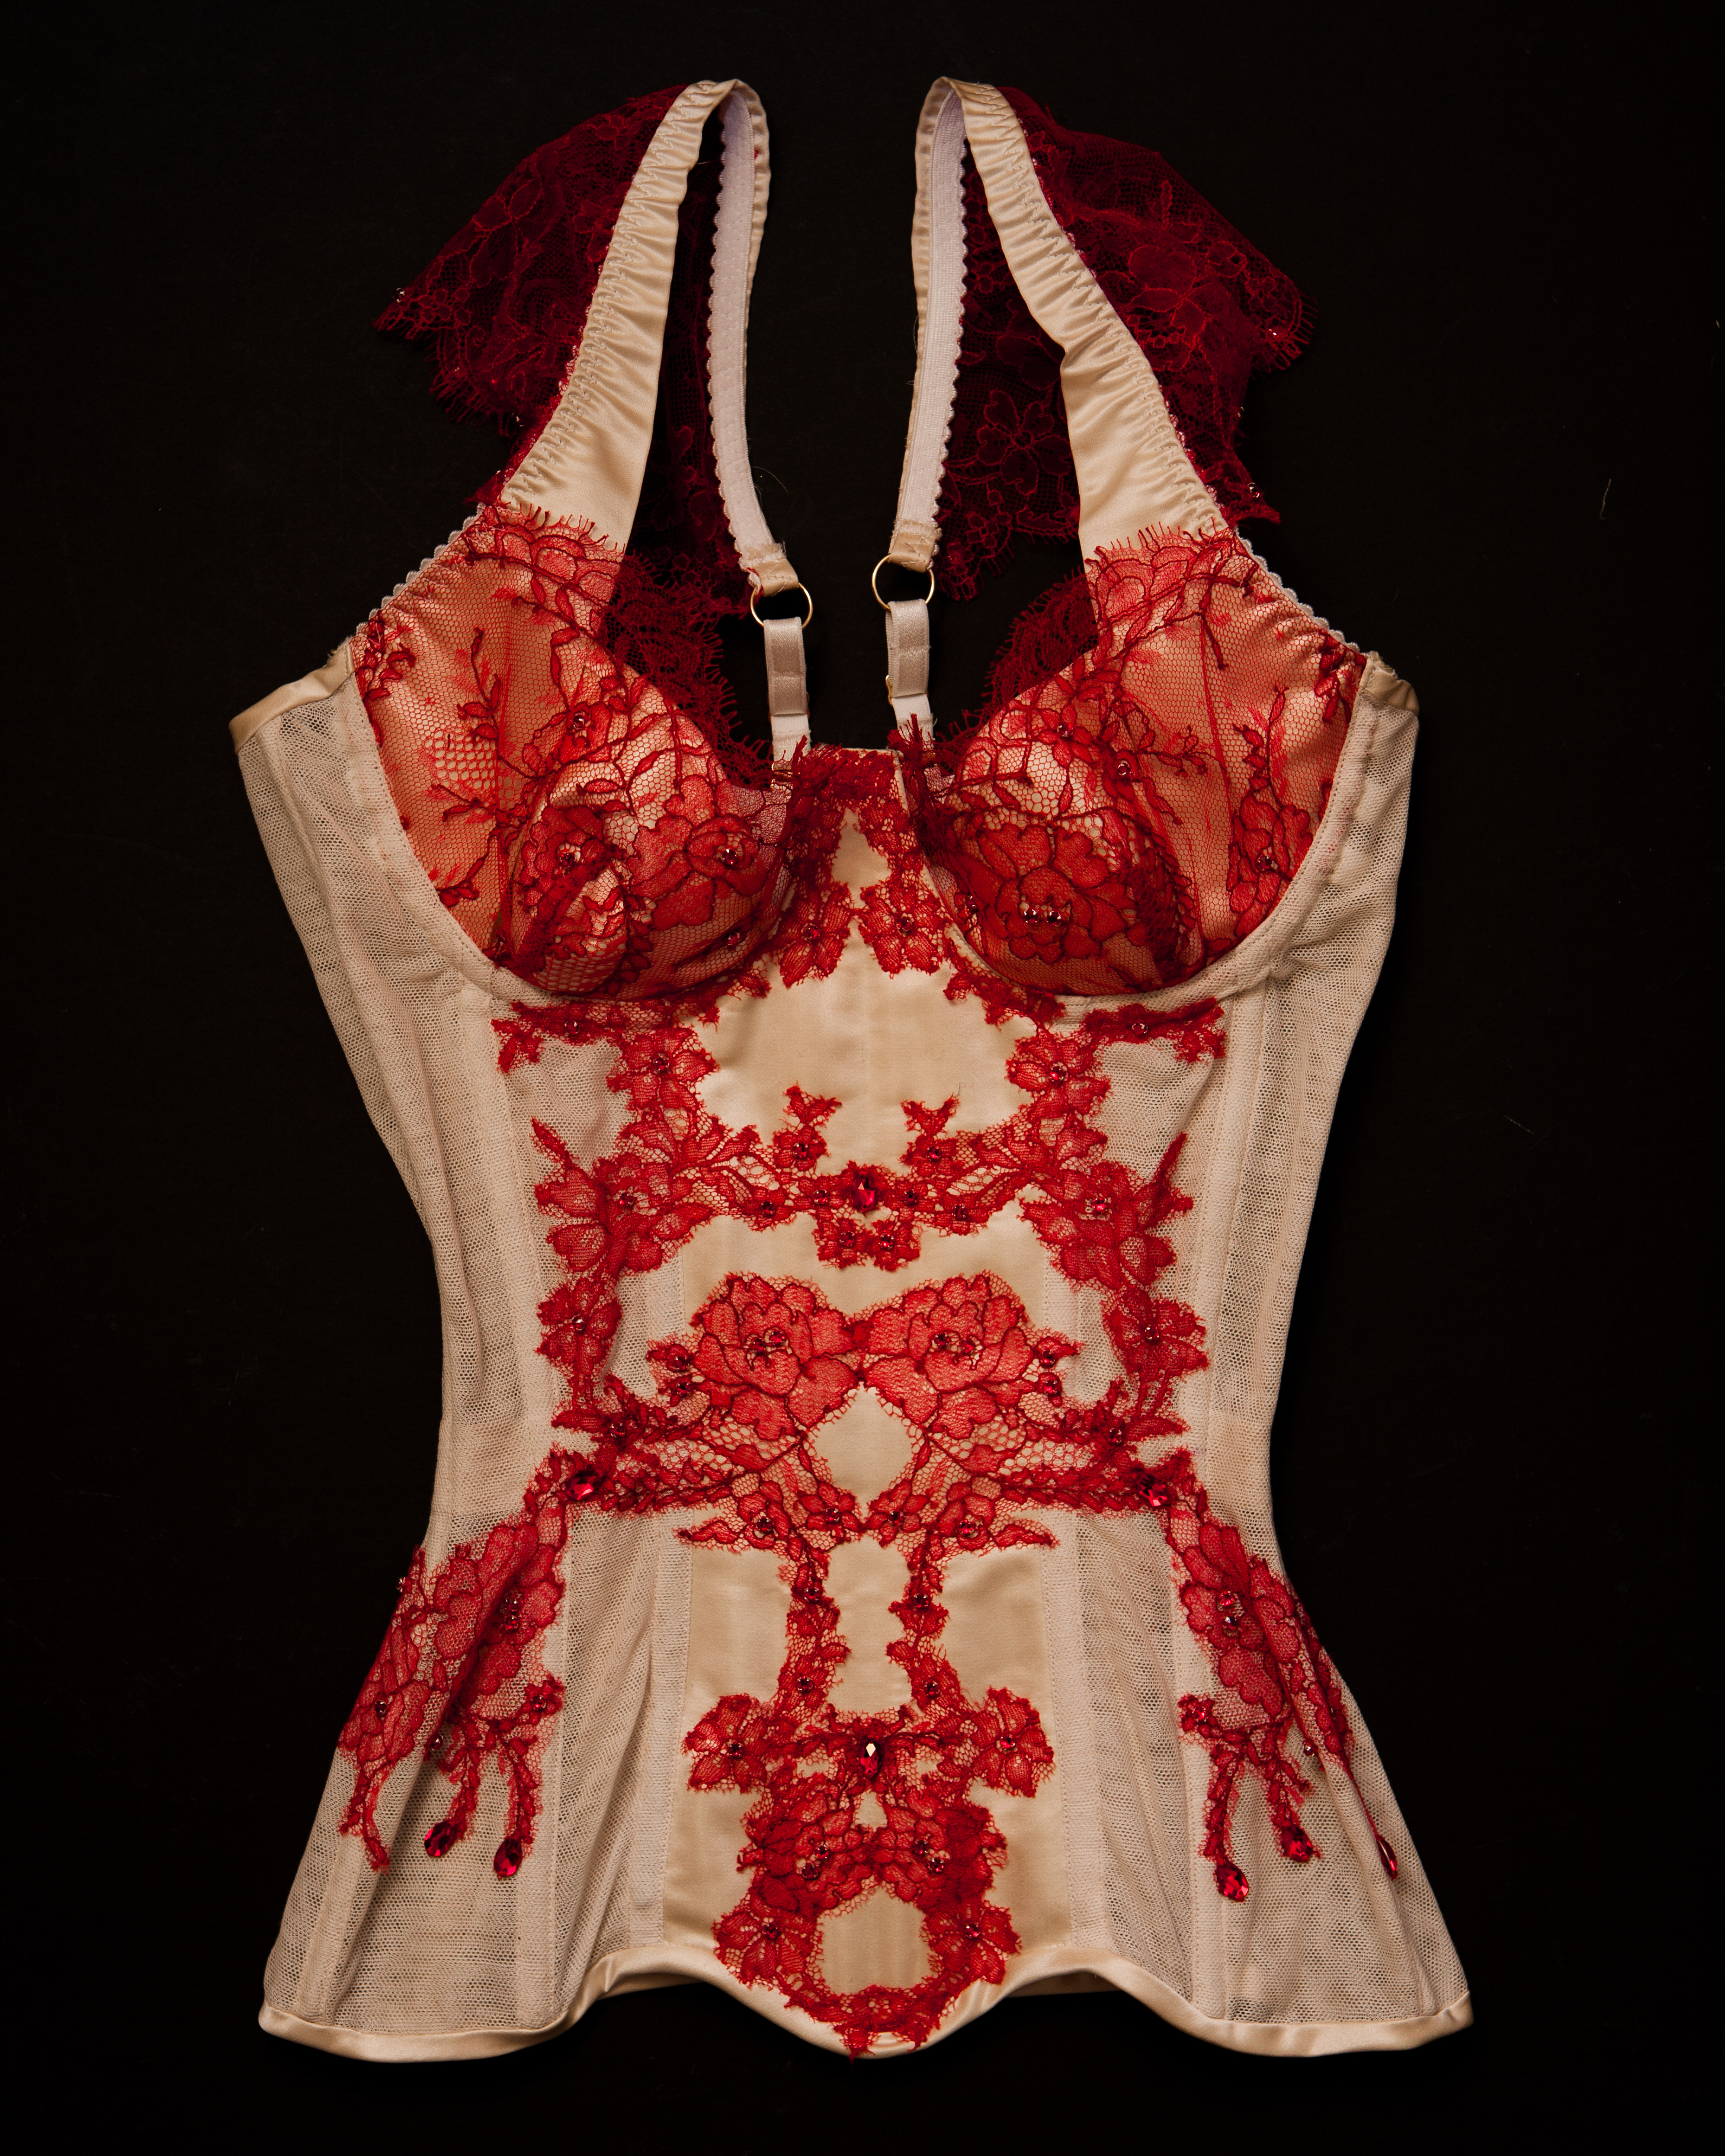
Thankfully, in the time away from the corset, one of my other crystal orders had turned up with red in the perfect scale: tiny and in metal settings. They’re subtle and delicate enough to feel organically part of the lace, with only a few pear drop crystals to accent the branch motifs of the lace. After another full day of sewing, I got the corset to a stage that I was finally happy with.
I was hoping to add a final couple of large scale crystals that have sadly not yet arrived in the post – fingers crossed they will turn up before the photoshoot tomorrow! Even if they don’t, I am pretty damn happy with how this outfit has turned out, and it will frankly serve me right not planning ahead enough with postal times.
Wish me luck with the photoshoot and the competition, I’ll be sure to share more and better photos soon!
Karolina xx

Good Lick Karolina, you deserve to win !
Good luck Karolina, you deserve to win this one !
It’s really beautiful and has such curves! I really like the lace sleeves also. To be honest though, I think my favourite will always be the Ink corset. I wish you the very best of luck!
Such a classy piece! I love red and white!